I saw this questionnaire from Craftzine on Wild Olive earlier this month and thought I would share my own answers. You should, too! Click on the button to get one for your own blog and answer this survey yourself. It's fun to be reflective every once in a while! One project you are particularly fond of 1. The Shale baby blanket. I think the pattern is a work of art! and I love that I wouldn't have been able to knit it two years ago. Yay for progress! Two mistakes you've made in the past 1. Not thinking about how my actions affect others. 2. Ruining a sweater (and its yarn) by trying to salvage the yarn. I basically just cut it in half, what was I thinking?! Three things that make your work unique
1. For knits: I try to use timeless designs with classic colors.
2. For embroidery: I'm basically just making up stitches as I go!
3. For cooking: Recipes with few ingredients.
Four tools you love to use
1. Interchangeable circular needles
2. Food processor
3. New dutch oven!
4. Ceramic loaf pans
Five inspirations (I'm going to limit myself to people who inspire me creatively. There are so many spiritual and professional role models in my life!) 1. Allison Gray. When I first saw her knitting, I knew I wanted to do it too! Not to mention the well of inspiration that is her blog. 2. Jared Flood. He shows me how beautiful knits can be. 3. Mollie Johanson. She makes embroidery seem easy! 4. Ashley Ann. Her photography and crafts are incredible, but her informative directions make them very accessible. 5. Judy Clack (my mother in law). I love her confidence that enables her to try new things, like watercolor painting! If you answer these questions on your own blog, be sure to share a link in the comments. I'd love to read it! Also share it with Craftzine by clicking on the button at the top.
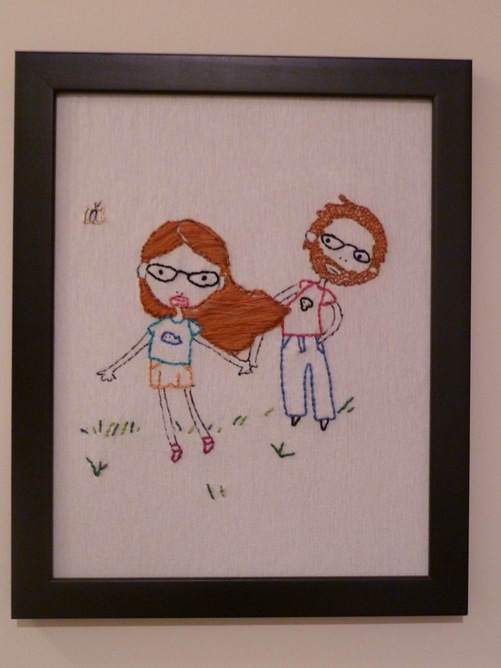
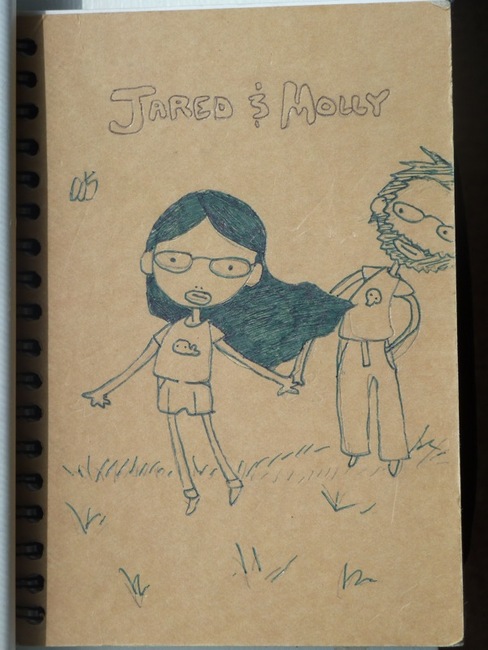
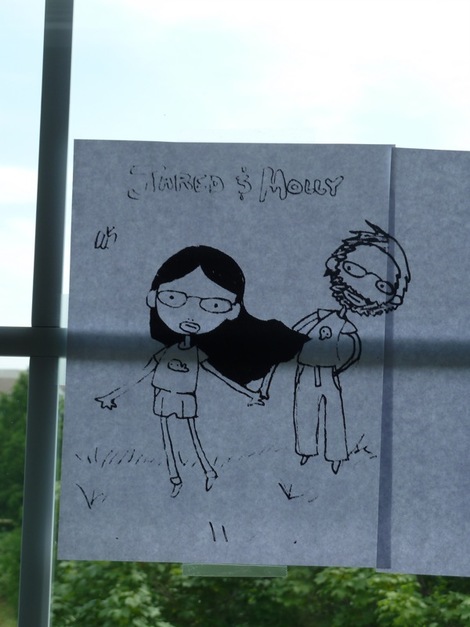
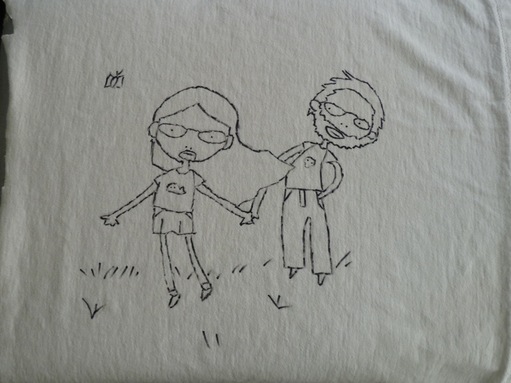
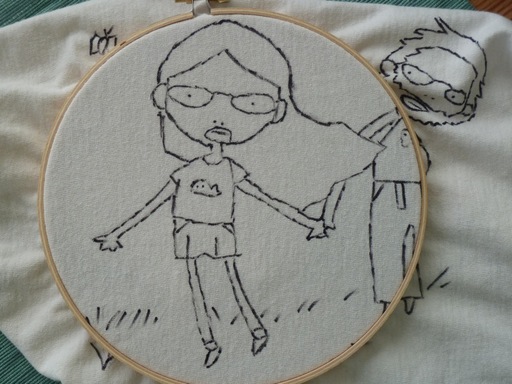
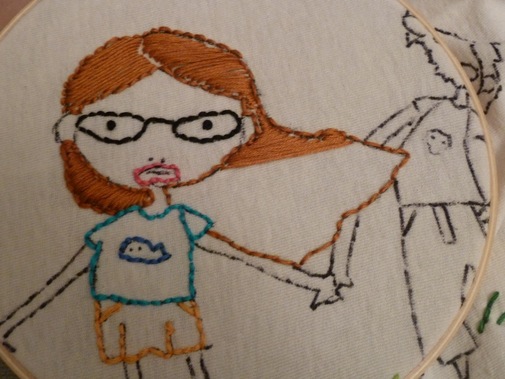
An embroidered family portrait! Here's how I did it! I've always loved this drawing of Jared and me! Isn't it adorable? Jared's brother Matt drew it on a journal that was a gift way back in 2006 (when my hair was really long). After I started cross stitching, it occurred to me that the simple lines of the drawing would be perfect for an embroidery pattern. So I took a picture, edited it so it would be bigger and black and white, then printed it out. Next, I taped it to a window, after drawing the rest of Jared's head... and taped fabric on top (I used an old white t-shirt that I cut up and then ironed)... so I could trace it! I used pencil at first, but couldn't see the lines when I finished. So I traced it again with permanent marker. I figured if I messed up, I'd just cut up another old shirt! Then, I stretched it over an embroidery hoop... and went to town! If I had the energy to do it all again I would make a few changes. For instance, I would have used a darker brown for our hair, but I didn't have a more appropriate color floss. I would have gone to buy some but I was in a stitching trance that could not be interrupted. Also, I think the stitches on my glasses are a bit off and it makes me look angry! Oh well, lessons learned.
So what do you think? Isn't it too cool how you can take any image that inspires you and transform it into an embroidery pattern?
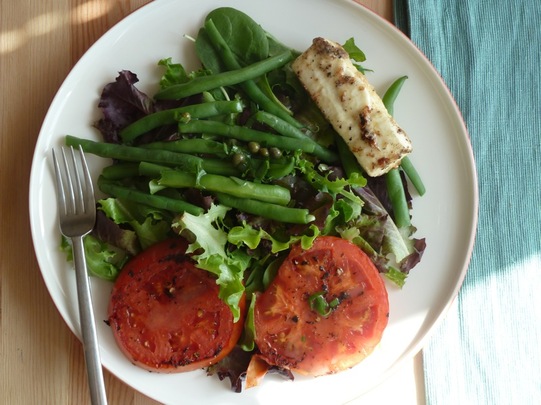
This salad really surprised me! I thought it would be bland and dry but I was wrong, it's perfect! Even though the feta wasn't beautifully breaded it was still a great complement to the tangy greens. The grilled tomatoes release just enough moisture to really coat the greens, allowing the dressing to be used sparingly so the flavor is fresh and light, not heavy. Grilled Tomato Salad with Green Beans and Feta. adapted from Real SimpleServes 4 5 tablespoons olive oil, separated juice of 1 lemon 1 tablespoon capers, drained 1 tablespoon chopped parsley 1 pound green beans, ends trimmed 1 8 oz piece of Feta cheese, not crumbled 2 large tomatoes sliced thick, like 4 slices per tomato. 1 tablespoon fresh thyme or 1 teaspoon dried thyme salt and pepper to taste 1/4 cup dry bread crumbs 6 cups greens, arugula, spinach or spring mix. In a small bowl stir together 4 tablespoons of the oil, lemon juice, capers and parsley. Set aside. I always make salad dressing in a mason jar and shake it to blend the ingredients. Boil a large pot of salted water. Add green beans and cook for 4 minutes. Drain and run under cool water to stop the cooking process. We want them to be crispy and fresh. Cut the block of feta into 4 slices. If necessary, place on paper towels to absorb the liquid it's stored in. Heat a non stick pan over medium heat. Sprinkle salt, pepper and thyme on both sides of the tomato slices. Cook tomatoes until lightly browned, only about a minute per side. Wipe out the skillet and heat 1 tablespoon of oil. Cover the feta with bread crumbs and cook about 2 minutes per side until browned. (This is where my feta started falling apart so I just gave up and put it on the plate. It was still delicious!) Arrange greens, beans, tomatoes and feta on plates then drizzle with vinaigrette. You may think there's not enough dressing for 4 people, but trust me there is! The liquid from the tomatoes makes the dressing go a long way. This may seem a little involved for a salad, but trust me it's really good and not difficult!
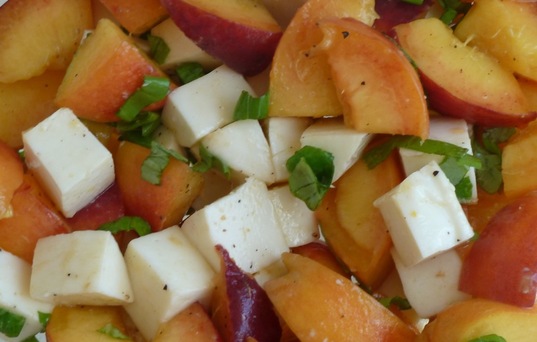
I love this salad! It's a great way to showcase juicy, bright peaches plus it's a unique summer side dish. Enjoy! I'll definitely make it again. Peach and Mozzarella Salad Source: Real Simple3 peaches 1 cup fresh basil leaves torn or chiffonade 8 ounces fresh mozzarella cut into 1 inch pieces a bit of olive oil, like a couple of teaspoons salt and pepper to taste. Cut each peach into 6 or 8 slices then cut each slice in half. Combine all ingredients in a large bowl and serve!
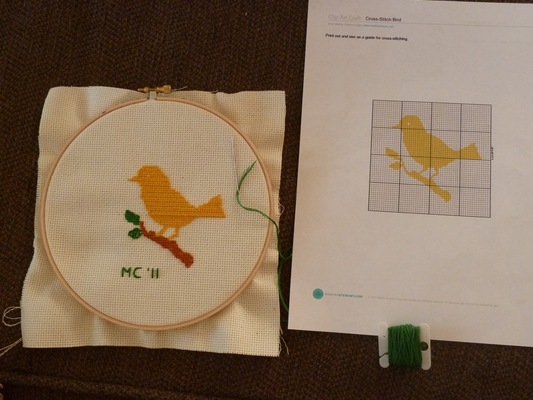
Ever since I saw Wild Olive's embroidery patterns, I knew I wanted to learn how to cross stitch. 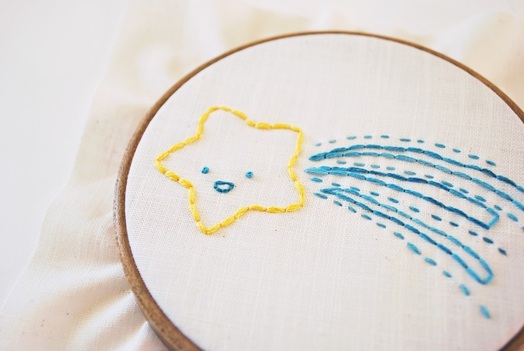 Image from Wild Olive etsy shop. Click image for link. Cuteness overload! (By the way, I asked Mollie, the Wild Olive shop owner, if I could use this picture, and she said yes and gave me the pattern, to boot! I was over-the-moon happy! Her shop is full of cute patterns and printable stationery, go check it out!) So, I've wanted to learn to embroider for a while now, but the stars just aligned this week. This is what happened. 1. Jared's mom was visiting and she was cross stitching. I really enjoyed watching her and it helped me understand what the process involves. 2. I had received a Michael's gift card and was waiting for inspiration to strike before I used it. 3. My sister-in-law Michele had given me cross stitching patterns she found in Martha Stewart Magazine because she remembered that I wanted to learn to cross-stitch. Isn't she sweet? 4. Then, this week, I saw this.  Image from Sam Gibson's etsy shop. Click image for link. Gorgeous! Such exquisite detail, I love it. When I came across this image browsing the internet I said to myself, "That's it Molly, you can't live another day without learning how to cross stitch." I immediately closed my laptop, got into my car and drove to Michael's. I came home with this!
I only paid 60 cents! Aren't gift cards the greatest?! So after many hours, a bout of double vision (is that normal when cross stitching?), and a bloody thumb, I had this! Certainly, not as good as Mollie's or Sam's, but at least you can tell it's a bird on a branch, right? To commemorate the occasion, I stitched my initials and year. I love how timeless the design is, unless I stitched the year on it no one would know when it was made! I'll be sure to keep you posted on my future embroidery projects!
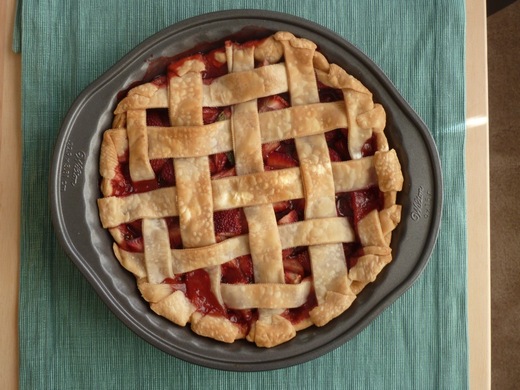
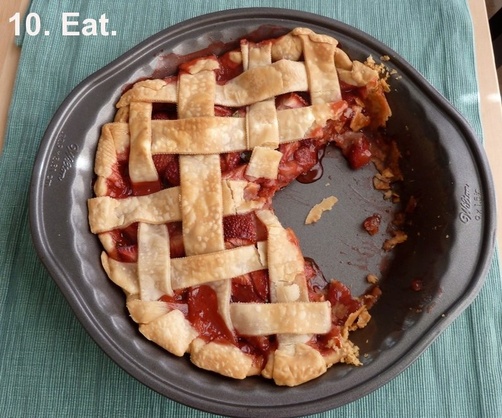
You know what I eat for breakfast when there is no granola left? Pie! Sometimes I eat pie even when there are more reasonable breakfast options available. Like this morning, as I am writing this post, I am enjoying this unique Strawberry Basil Pie. Have you ever had a Strawberry pie? Me neither, and definitely not one with basil. It is quite tart and refreshing!
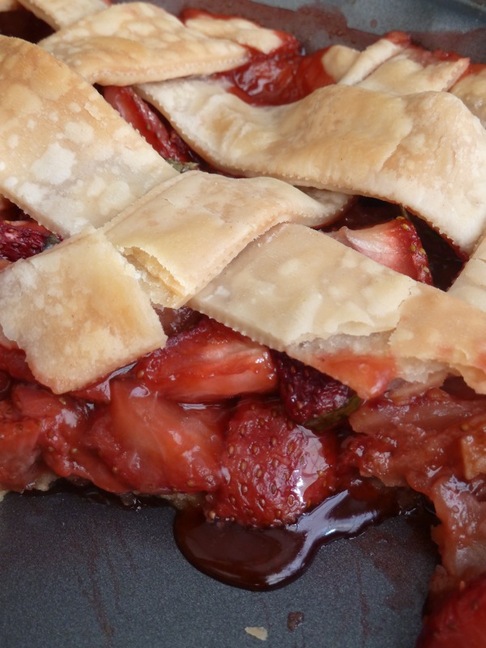
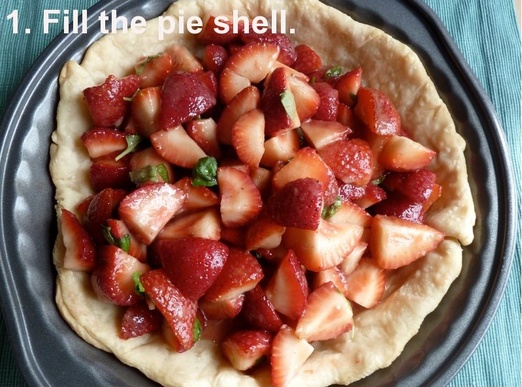
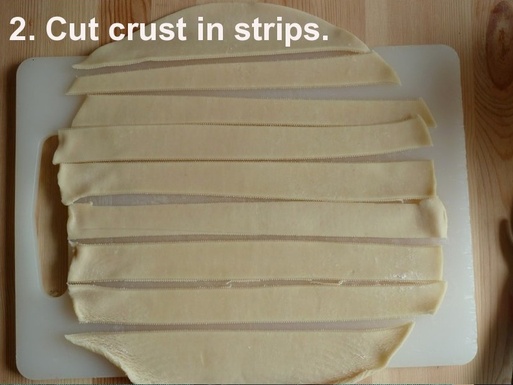
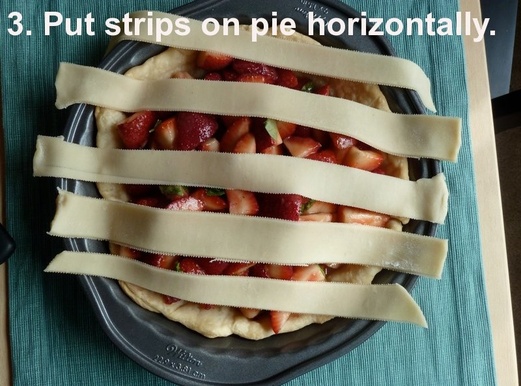
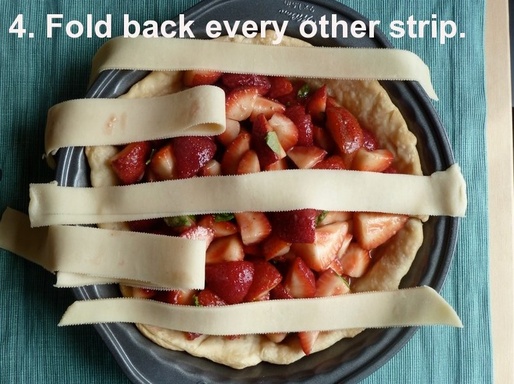
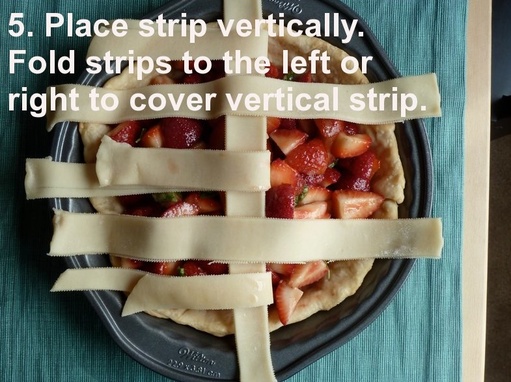
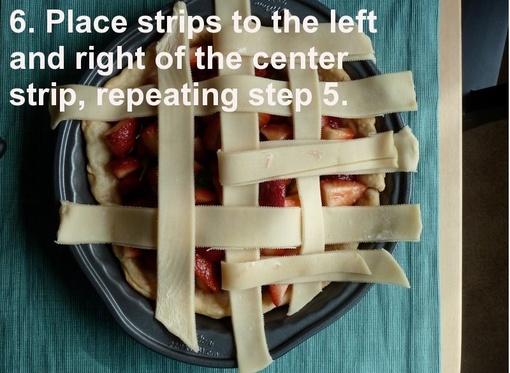
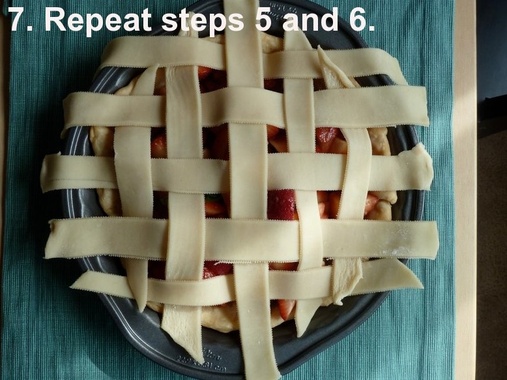
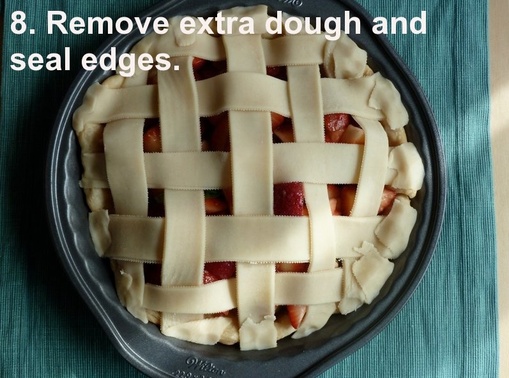
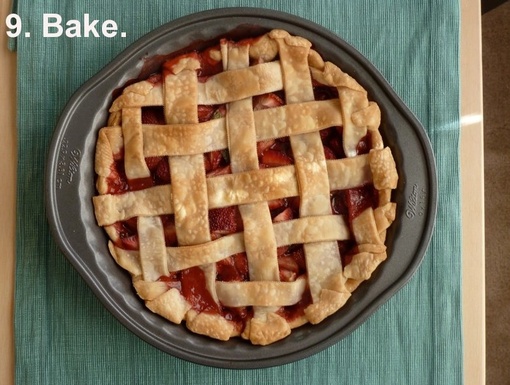
The filling is 2 pounds of strawberries, 10 torn basil leaves, 3/4 cup brown sugar and 1/4 cup cornstarch. Mix it until it looks like this, as if the strawberries were covered in syrup. You just pour that into a baked pie shell, form a lattice crust and you're done! Strawberry Basil Pie slightly adapted from Esa's of Butter Love Bakeshop recipe published in the August 2011 issue of In Style Magazine. 2 pie crusts (I used Pillsbury brand, I'm not good at making pie crust!) 2 pounds strawberries, washed hulled and quartered 3/4 cup brown sugar (if your strawberries are very sweet use 1/2 cup) 10 fresh basil leaves, torn into quarters 1/4 cup cornstarch Bake the pie shell in a 350 degree oven for 15 minutes. Be sure to weigh down the shell by lining it with parchment paper and place pie weights or dry beans or rice on top. This helps the shell keep it's shape as it bakes. It's important to bake the shell in advance because this pie filling is super watery and the shell would be soggy otherwise. While the shell is baking, prepare your strawberries and basil. Stir together strawberries, basil, brown sugar and cornstarch in a bowl until the strawberries look like they are covered in syrup. Once the pie shell is baked, pour in the strawberry filling and top with a lattice crust. Bake for 60 minutes or until the juices are bubbling and the lattice is browned. Let cool and serve!
I hope this was helpful! Now go bake a pie! (This pie has Strawberry Basil filling, recipe soon to come!)
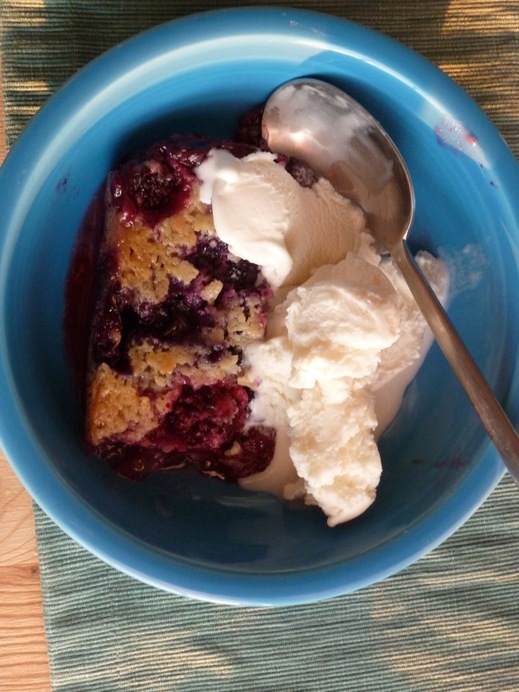
Did you know that July is National Ice Cream Month? Yep! And what better way to celebrate than with a bowl of vanilla ice cream accompanied with warm berry cobbler? I've never made cobbler before, so I was surprised at how easy and simply delicious this recipe is. It's a great way to enjoy all those beautiful blueberries in season now. Blackberry Blueberry Cobbler adapted from Food Coma1 pint blackberries 1 pint blueberries 1 cup sugar 2 tbspns corn starch 3/4 cup flour zest of 1/2 a lemon 3/4 teaspoon baking powder 1/2 teaspoon salt 1 egg 1/4 cup milk 1/2 teaspoon vanilla 3/4 cup butter, melted In a 9 X 9 baking dish stir together the berries, 1/2 cup of the sugar and 2 tbspns corn starch. You just made the filling! Easy! For the crust whisk the flour, the second 1/2 cup of sugar, lemon zest, baking powder and salt together in a separate bowl. Stir in the egg, milk and vanilla until incorporated. Pour in the melted butter after it has cooled a bit (you don't want to scramble your egg!) and stir until you have a nice batter. Pour the batter over the berries. Bake at 350 for 45 minutes or until the batter is cooked through. Serve with vanilla ice cream and enjoy!
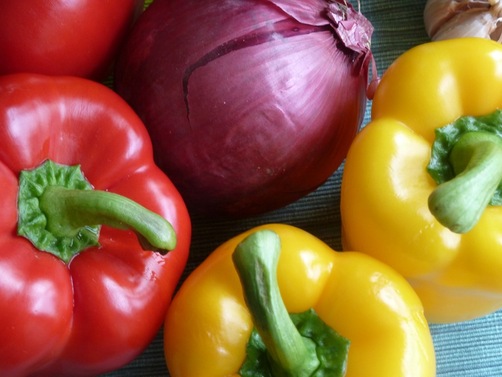
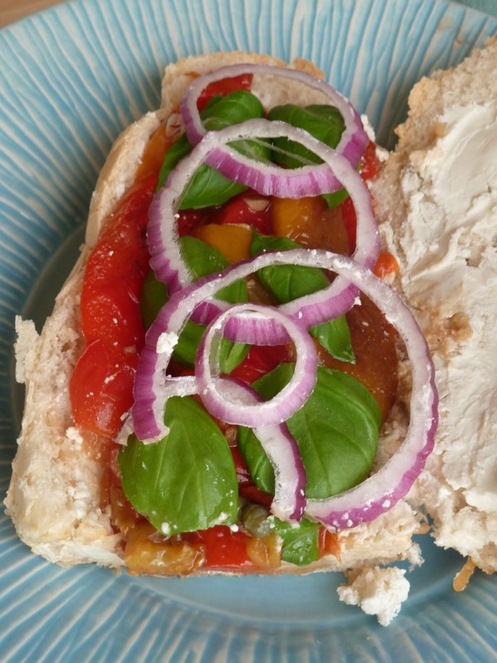
I made these sandwiches for Jared's parents as they visited this weekend. I wanted to serve something summery and memorable but something that wouldn't pull me away from our guests and imprison me in the kitchen. This was perfect! All you have to do is roast and peel the peppers then marinade them for a couple of hours or overnight in a blend of olive oil, balsamic vinegar, chopped garlic, capers, salt and pepper. Then you just assemble the sandwiches when you're ready to eat! The marinated peppers have a bright flavor that are perfectly paired with creamy goat cheese, peppery fresh basil leaves, and crisp red onion. Try these sandwiches! They're ideal for guests or for a summer picnic. Roasted Pepper and Goat Cheese Sandwiches Serves 4
2 red bell peppers 2 yellow bell peppers 2 tablespoons olive oil 1 tablespoon balsamic vinegar 2 cloves garlic chopped 2 tablespoons capers, drained 2 teaspoons salt 1 teaspoon pepper enough fancy bread for 4 sandwiches, ciabatta or focaccia perhaps 8 oz goat cheese 1 red onion lots of basil leaves
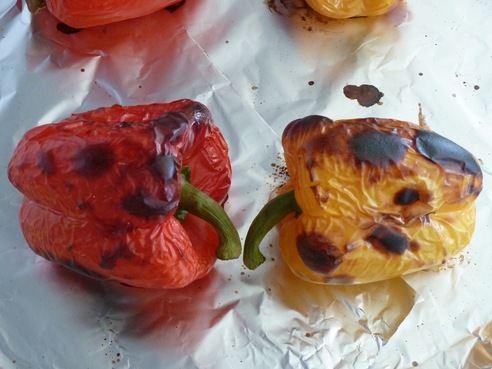
Preheat your oven to 350 degrees. I know, it's the middle of summer, who wants to have a 350 degree box in their house? If you just can't stand heating up your oven, you could buy 2 bottles of roasted red peppers instead. Otherwise, roast the peppers for 30 minutes then place in a folded paper bag or covered bowl to cool and sweat a bit. After they are cool enough to peel, slice them in half and remove the seeds. Peel the skin off and cut the half in half again, so you should have 4 slices for each bell pepper.
In a bowl mix together the olive oil, balsamic vinegar, capers, garlic, salt and pepper. Spoon the mixture over the peppers and marinate for a few hours. When you're ready to eat, assemble the sandwiches. Spread the goat cheese on both sides of the bread, top with peppers, then add a few slices of onions and cover with fresh basil leaves.
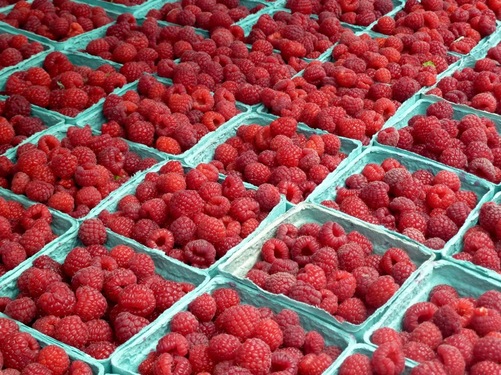
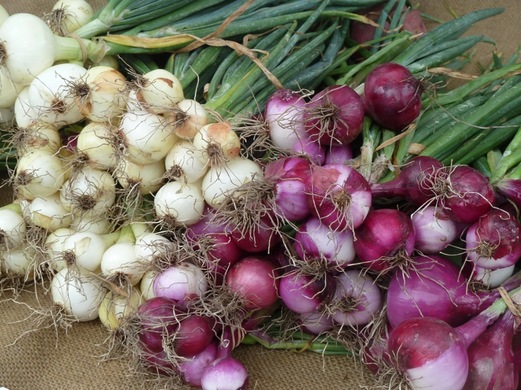
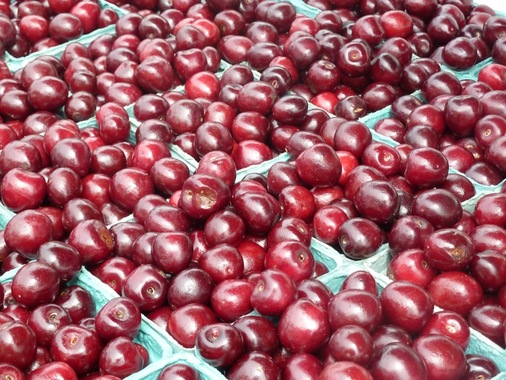
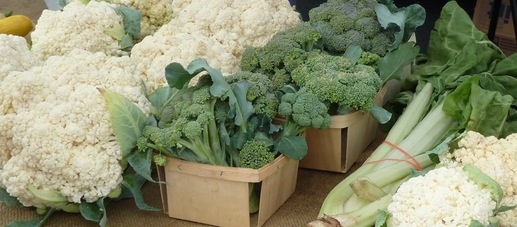
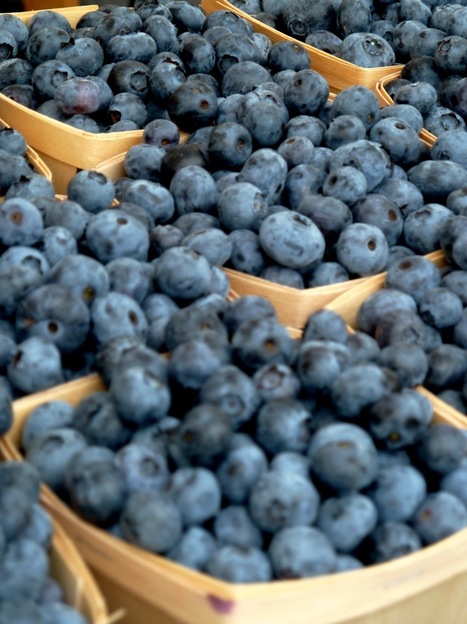
Just wanted to share some pictures from the Farmer's Market this weekend. This week I'll share two farmer's market inspired recipes, so stay tuned!
|


 RSS Feed